Power supply for Arduino
Article-series: Programming Arduino from scratch #3
The simplest option is to supply 5V power directly to the controller (there is a corresponding “5.5V” pin for this). However, if you accidentally increase the voltage, there is a risk of burning the controller since the power is supplied directly. Additionally, the board has a built-in voltage stabilizer that protects the controller from surges. It is connected to the “VIN” pin and to a separate power connector on the board. What voltage can be applied to it?
The operating voltage of the controller is 5V, which it can apply to the pins or read from the input. For instance, if you connect a voltage of 5V to a contact, the controller will read that it is logical 1. In terms of the Arduino software shell, this value is HIGH (for digital input). For analog input, the voltage is interpreted as a number from 0 to 1023. In other words, 5V on the analog input of the controller corresponds to the value 1023.
The recommended and maximum power supply voltage is what you can supply to the board from the power supply or batteries. The board has a power converter that lowers the input voltage to the 5V required by the controller. Since it does not have 100% efficiency, supplying at least 6V (preferably 7V) is necessary to get the 5V needed. However, you need to be careful with the maximum voltage. The converter can theoretically handle up to 20V, but the higher the voltage, the more it will heat up. In fact, this is power that is not spent on anything useful. If the power is from batteries/accumulators, then you will simply heat the air with their help. Furthermore, the higher the voltage and temperature, the greater the likelihood that the controller will fail sooner or later. If you are not sure about the quality of the controller, do not exceed the recommended 12V. Even if you are sure, do not go beyond this limit unless it is absolutely necessary.
In addition, you need to consider how much current you need for your peripherals. If consumption at any point in time exceeds the controller's limit, it will start to work unstably or even reboot. The controller has a limit on the maximum current from one output (50 mA for the most common Arduino Uno model). This current is enough to light an LED or turn on a relay. However, for motors and servos, you will need to power them separately. Special motor drivers are used for DC motors and stepper motors, which have the ability to be independently powered. Small servos can be powered directly from the controller, but if there are many of them or they have high power, then it is also recommended to power their power lines separately.
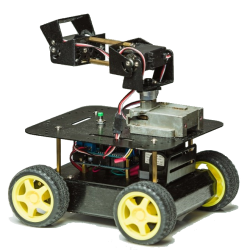
If your project is stationary and there is a regular outlet nearby, you can use a regular 7-volt power supply. They can be designed for a current of 1A or more depending on the consumers. The rule is simple: calculate the maximum power consumption and add 20% for safety. For example, if you use DC motors with a starting current of up to 500mA, taking into account the consumption of the board itself of about 40mA, you will need (500+500+40)*1.2=1248mA. You will be satisfied with a 1.5A power supply. If you have a mobile robot, the simplest option is to use ordinary finger-type batteries. If you use AA batteries (1.5V), you will need at least four of them (6V), and preferably five or six (7.5-9V). If you use batteries of the same standard size, you will need a battery compartment for five (6V) or six to seven batteries (7.2-8.4V) for the same voltage. The most common option is to use components that are designed for a voltage of about 6V.

 Books
Books Technology
 Electronics
 Programming
 Weaponry
 Arduino
 Projects