 Books
Books Technology
 Electronics
 Programming
 Weaponry
 Arduino
 Projects
For those who are new to controllers, this guide covers basics of programming Arduino controllers.
For those who are new to controllers, this guide covers the basics of programming Arduino controllers.
You will be able to understand the basic principles of Arduino programming, control of basic components (servos, motors, sensors, screens) to create your own starter project
#1: Controller Programming - Get started
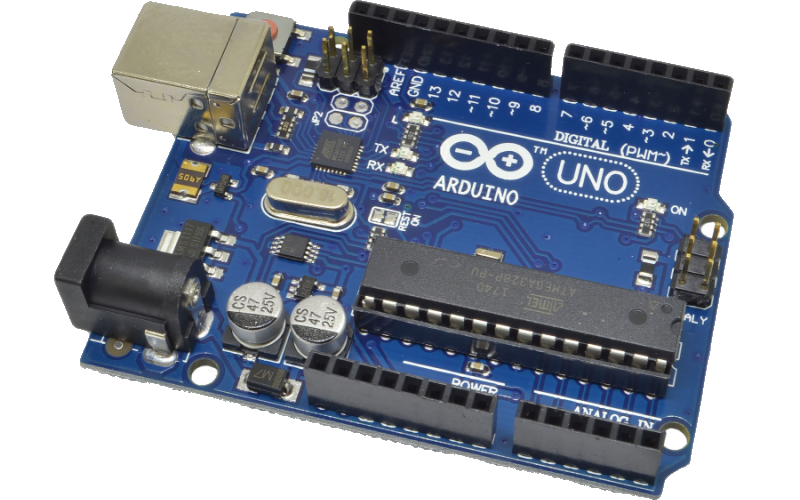
One day, a beginner decides to start programming controllers. It's an interesting and useful activity, as you can physically see the outcome of your work, rather than just on a computer screen. However, for those without much experience in radio electronics, it can be difficult to know where to start. The best option is to begin with a beginner-friendly controller that does not require in-depth knowledge or skills. Arduino is one of the easiest controllers to learn and it is readily available for purchase.
#2: Connecting peripherals, expansion boards
We chose Arduino to get acquainted with microcontrollers. Now let’s look at what an expansion card is and in general how we can connect something to the controller.
#3: Power supply for Arduino
One of the first questions that a novice controller programmer may have is how to power their project. Let's explore the options for proper power connection.
#4: Connecting the servo drive to Arduino
Article-series: Arduino - using_servos #1
Let's explore the possibility of performing basic actions using a physical controller instead of a computer screen. We'll take a closer look at servo drives, learn how to connect them to an Arduino controller, and review the fundamentals of control using the standard Servo library.
#5: Independent control of multiple servos. Timers
Article-series: Arduino - using_servos #2
We have learned how to change the position of the servo, but this control has several disadvantages. Let's try to connect two servos in parallel and achieve their synchronous movement. Let's try using timers instead of the delay() function.
#6: Creating a class to control a servo drive
Article-series: Arduino - using_servos #3
Connecting one or two servos may not be challenging. However, if you need to use a lot more of them, it is advisable to create your own class for a servo drive. This way, you can register all the necessary variables and functions once, which will simplify the process.
#7: Connect a DC motor. Microcircuit L298P

Article-series: Arduino, using DC motors #1
Consider the option of connecting a conventional DC motor to the controller, which can be used, for example, to move the robot or perform useful work. To do this, we will use a motor controller based on the common L298P microcircuit.
#8: Connecting a stepper motor. Controller L298
Article-series: Arduino, using stepper motors #1
Let's try to connect a stepper motor to the controller via the L298 chip and look at the basics of controlling it using the standard Stepper library